Create themes
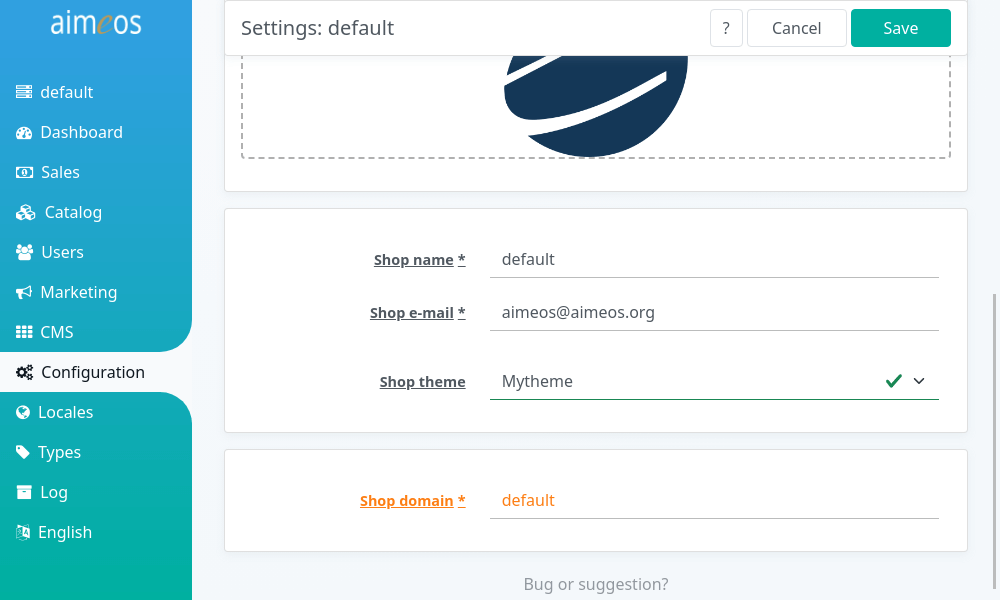
For Laravel, Aimeos offers a way to create distributable theme that you can offer as self-contained packages for download or installation via composer. These themes can be selected per site in the Settings panel of the Aimeos admin backend after installation:

Create theme extension#
To create a distributable theme, you must generate an extension for your theme first using the Aimeos extension generator. Choose "Laravel theme YYYY.x extension" where YYYY.x is the Aimeos version the theme is for, enter a name of your theme and click on "Download".
Installation#
Composer installation#
To create a portable theme, you should generate an extension for your theme first using the Aimeos extension generator. Choose Laravel theme YYYY.x extension suitable for your installed Aimeos version.
Installation must be done via composer as this ensures that everything works out of the box for everyone automatically. This requires that you distribute your theme package via one of the repository types supported by composer. Then, you or your users just need to execute:
composer req aimeos-themes/<mytheme>
Local installation#
For local installations only, you can add your theme package into the ./packages/ directory of your Laravel application.
- Create the directory for your theme by executing e.g.
mkdir -p packages/mytheme - Unzip the downloaded .zip theme package into that directory
- The name entered during extension generation must be the same as the directory name
Furthermore, you have to add a repositories section to the composer.json of your Laravel application which must contain these lines:
    "repositories": [{
        "type": "composer",
        "url": "https://packages.aimeos.org/aimeoscom"
    }, {
        "type": "path",
        "url": "packages/*"
    }],
Also, make sure that your root composer.json contains this post-update-cmd section so the theme files are published automatically after installation:
    "scripts": {
        "post-update-cmd": [
            "@php artisan vendor:publish --tag=laravel-assets --ansi",
            "@php artisan vendor:publish --tag=public --ansi"
        ]
    }
Finally, install your theme using:
composer req aimeos-themes/<mytheme>
Then, you can select your new theme in the Settings panel of the Aimeos backend. To clear the cached templates, delete the frontend cookie of your Laravel application and run this command:
php artisan aimeos:clear
Blade templates#
For Laravel, the Aimeos package includes structural templates for each page which extend from the base layout to build e.g. a catalog list, a basket or checkout page. These structural Blade template files are located in the ./views/ directory your theme package.
The base.blade.php template file is used by most templates and references the CSS and JS files of the theme. The ./catalog/list.blade.php template uses the base template via @extends('...') and adds the output of the configured components to the sections defined in the base.blade.php layout template.
If you want change the structure and use a one column layout for your list page, you must adapt the ./packages/<extname>/views/catalog/list.blade.php file of your Laravel theme YYYY.x extension you've created and change the aimeos_nav and aimeos_body sections like in this example:
@section('aimeos_nav')
@stop

@section('aimeos_body')
    <?= $aibody['catalog/filter'] ?>
    <?= $aibody['catalog/lists'] ?>
@stop
Afterwards, the categories, price, supplier and attribute filter will be shown above in the search result page.
Note
For the pages displaying a category, you have to adapt the ./catalog/tree.blade.php file too.
HTML client templates#
Most often, you don't need to change the structure of the HTML templates because you can rearrange the layout using CSS to a large degree. If your layout requires a different HTML structure, you can overwrite the HTML client templates from the ai-client-html extension.
CSS and JS files#
The files located in the themes/client/html/<mytheme> directory of your Aimeos theme extension for Laravel are distributed within the package but are not used. Instead, the will be automatically copied to the ./public/vendor/shop/<mytheme> directory of your Laravel application by the last composer command.
For development, you will change the files in the ./public/vendor/shop/<mytheme> directory but for distributing them, you have to add them to the ./packages/<mytheme>/themes/client/html/<mytheme> again and push their changes into the package repository.
For more information about how to adapt the CSS and JS theme files, please read the article for creating themes.